Getting Started#
In five minutes, you should be able to pick a colormap, assess it, and run a safe default improvement workflow.
Install#
uv add scicomap
or
pip install -U scicomap
Quickstart#
The same starter workflow is available in Python and CLI forms.
import scicomap as sc

cmap = sc.ScicoSequential(cmap="hawaii")
cmap.assess_cmap(figsize=(14, 6))
cmap.unif_sym_cmap(lift=None, bitonic=False, diffuse=True)
cmap.draw_example()
scicomap check hawaii --type sequential
scicomap report --profile publication --cmap hawaii --type sequential
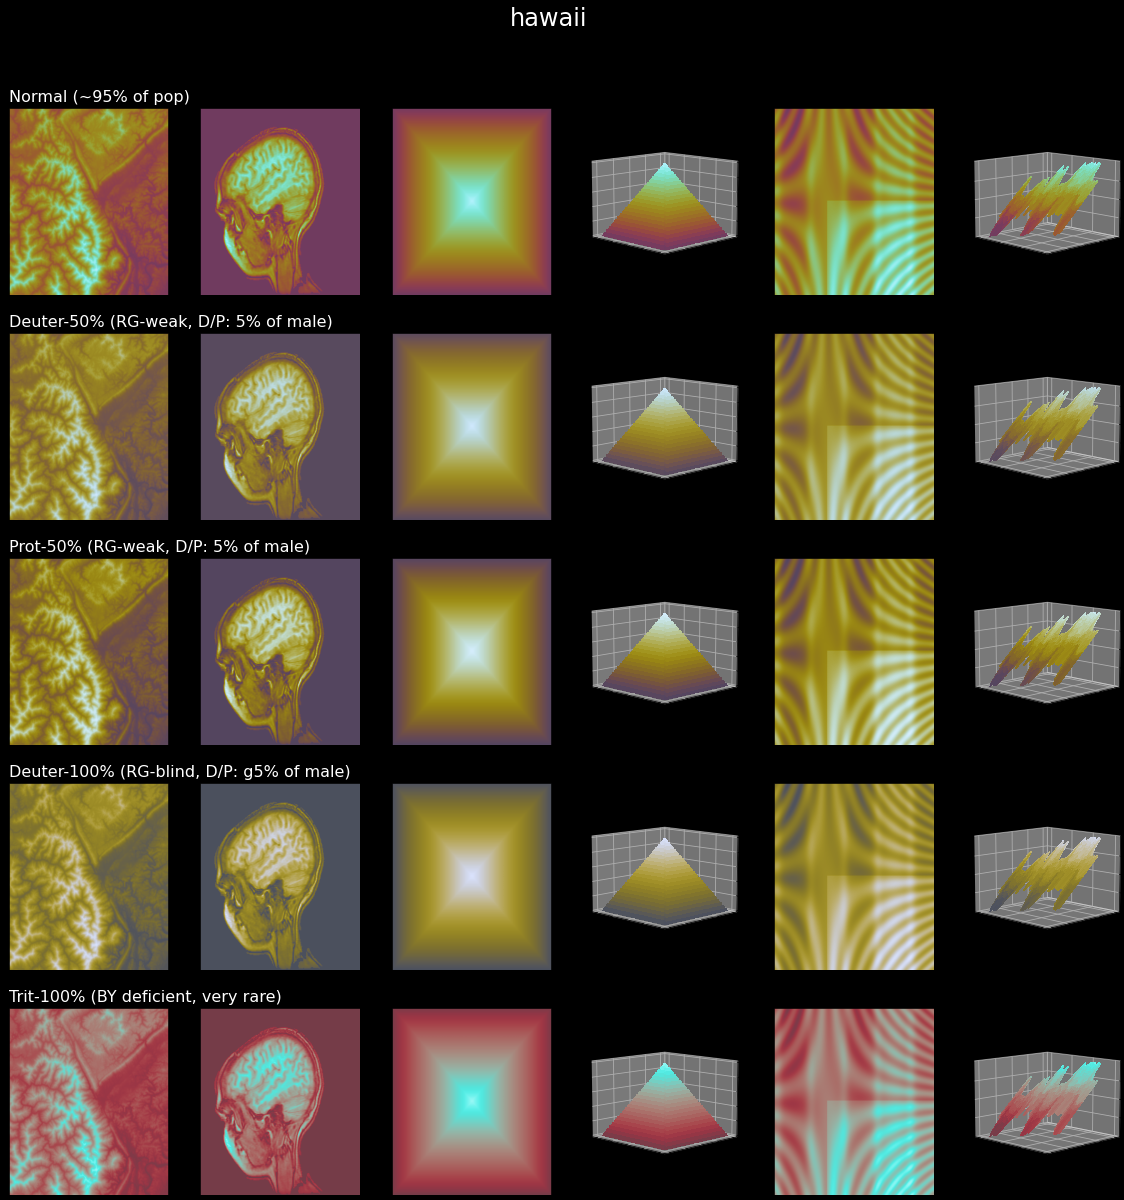
scicomap cvd hawaii --type sequential --out hawaii-cvd.png
Expected result:
- A diagnostics status (good/caution/fix-recommended)
- A report directory containing summary.txt and report.json
- A colorblind preview image at hawaii-cvd.png
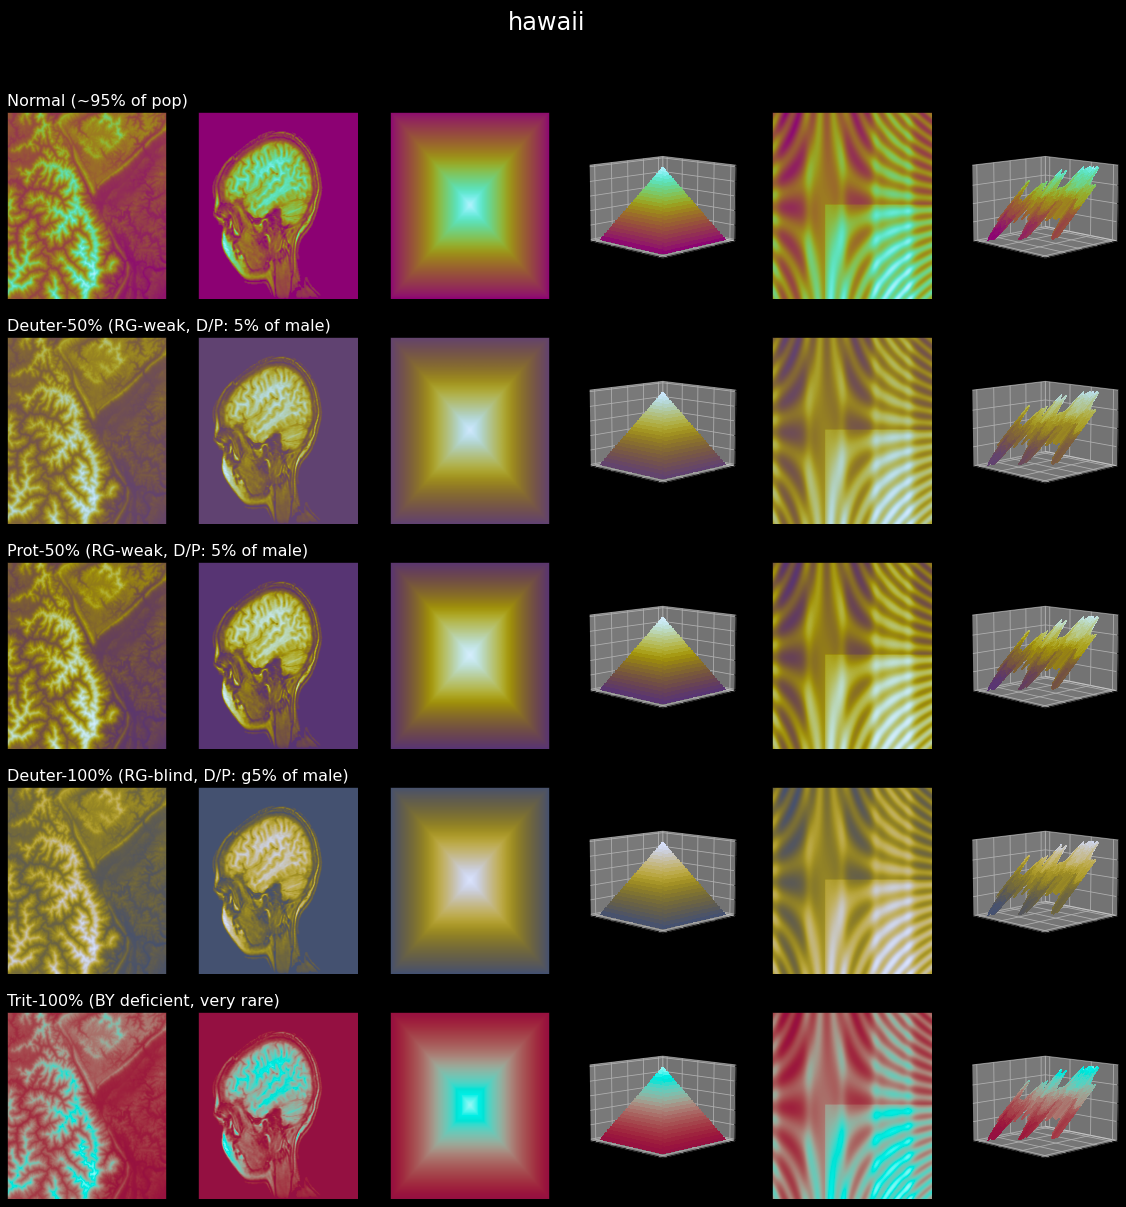
Typical visual output from assessment-style workflows.#
Simple usage#
Use these commands and APIs first if you are new to scicomap.
import scicomap as sc

cmap = sc.ScicoSequential(cmap="hawaii")
cmap.assess_cmap(figsize=(14, 6))
scicomap check hawaii --type sequential
scicomap preview hawaii --type sequential --out hawaii-assess.png
Choose a colormap family#
sc_map = sc.SciCoMap()
sc_map.get_ctype()
scicomap list
Typical output:
dict_keys(['diverging', 'sequential', 'multi-sequential', 'circular', 'miscellaneous', 'qualitative'])
Get a Matplotlib colormap object#
plt_cmap_obj = cmap.get_mpl_color_map()
Advanced next steps#
Use profiles and guided workflows when you want repeatable quality checks.
scicomap wizard --profile quick-look --type sequential --cmap thermal --no-interactive
scicomap report --profile cvd-safe --cmap thermal --format json
After correction, transitions and gradients are typically more stable across test images.#
Where to go next#
Read User Guide for common workflows.
Open CLI Reference for command-first usage.
Open Scicomap Tutorial for the complete walkthrough.
Try Interactive Marimo Tutorial for an interactive browser tutorial.
Check FAQ for practical decision rules.